The basic Sidewinder – Sidewinders, squeezers, and crushers
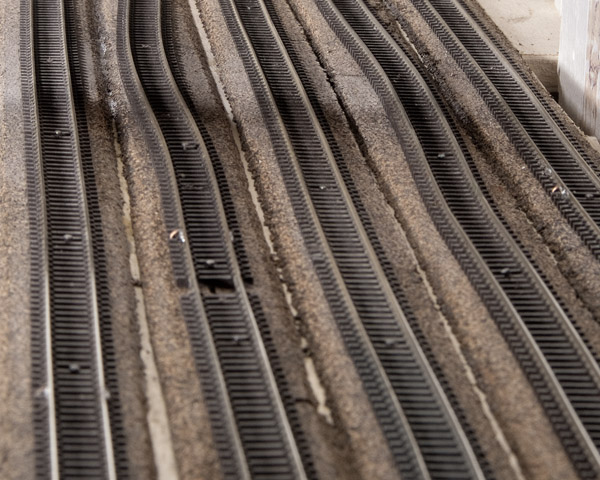
The easiest of these gremlins to recognize and fix is shown above. I had several like this on my N scale layout last spring, and I can only surmise that they happened because the basement was dry over the winter, causing the wood to shrink.
I don’t solder rail joints, except occasionally on curves, so fixing these kinks was a simple matter of sliding back the rail joiners, pulling the rail ends free, nipping them off a tad, and reinstalling them. I was surprised how little rail I had to remove (and you certainly don’t want to remove too much, or you’ll have gaps later). Snipping off just 1/16″ of rail was enough to straighten several feet of track that had deflected a good inch.
If you do solder your rail joints, you should be able to remove kinks like this by cutting the rail with a cut-off disc in a motor tool. This will remove just enough material to straighten the track again.
The subtle Squeezer – Sidewinders, squeezers, and crushers
For nearly a year trains had run through a couple of my turnouts flawlessly, but then when I started running trains again after several months off for construction, those same turnouts had turned mean. Equipment running through the diverging routes would occasionally derail.
The image above shows how hard it can be to spot these insidious little devils. Turns out the rails leading from the turnout were exerting enough pressure to deform the curved stock rail in the turnout and tighten the gauge. (The weakest area in your track is that little notch in the stock rails that the points tuck into.)
I couldn’t see this problem with the naked eye, but my cars and locomotives could sure feel it, as could my National Model Railroad Association standards gauge. Once I understood these subtle “Squeezers,” fixing them required the same procedure as their more blatant brethren. Slide back the joiners, nip off a snippet of rail, and put it back together.
The Crusher
The last kink I’ll discuss is by far the nastiest, and tracking it down cost me about a week of frustration. One day the entire layout just shut down and wouldn’t turn a wheel. I went around the layout pushing buttons, and all the turnouts moved as they should. There was no power on the track, but when I disconnected my power supply and Digital Command Control system from the track, they checked out fine.
In short, something was shorting the rails, a scary proposition. A mechanical problem may be hard to see, but at least you have an idea of where it is – the place where the train comes off the rails. But an electrical problem is usually invisible, at least to me.
The Atlas code 55 turnouts I use have insulated frogs. The big advantage of these is that you don’t have to isolate them from the frog end, so in theory
at least, you only need a single pair of feeder wires for your entire layout.
My problem was that enough pressure was being exerted against one of the diverging rails to crush the little piece of plastic isolating it from the frog. The turnout was being shorted through the frog, and with it, the entire layout. I’d have found this right away if I’d gone around lining turnouts with the power on. Again, the fix was to relieve the pressure and reassert the gap.
Know your stuff
That gap closed again on the morning the Model Railroader guys were coming for their annual layout tour, but this time I knew what to do. I also stuck in a sliver of styrene to make sure the gap stayed open.
You know, it’s hard to beat experience. Jim Hediger’s HO scale Ohio Southern was also on the tour, and he reported that he’d found three crushers on some new trackwork that very morning. He’d fixed them all in about 10 minutes.