When you enter their website, you discover that you can read the manual which is well written and easy to understand – no software jargon. Additionally, AnyRail offers a free trial download that allows you to design a basic layout and engage in what rapidly becomes a very user-friendly experience. As I experimented with the trial software, I became so engrossed that I quickly reached its limits. For me, this was an extraordinary outcome since I had little expectation of successfully learning, much less enjoying, the software. So I made the very reasonable investment of $59 and bought the full package, which includes free updates. AnyRail is a download product only and takes only a few minutes. Apparently it is available only for Windows, including Windows 7.
If you invest an hour or two with the free trial package and also refer to the manual from time to time, you’ll be able to start planning almost immediately; it’s that easy to learn. You start with a few basic parameters such as the measurement system you want to use (metric or English), the dimensions of the layout, grid size, etc.
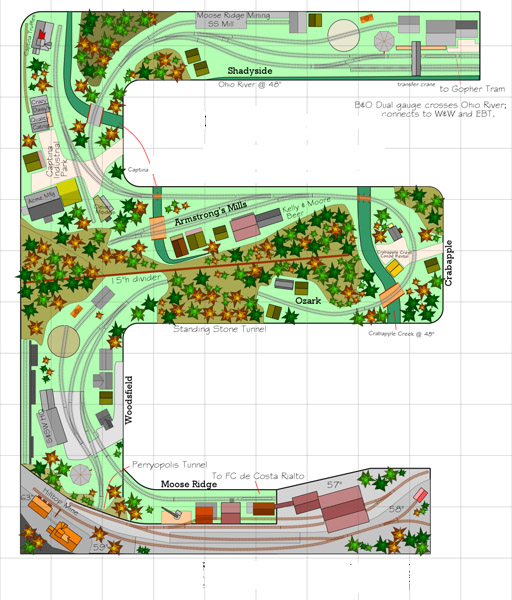
There’s a “track library” where you select the brand of track you intend to use on your layout. I used Atlas flextrack combined with Peco switches. Essentially, you begin by selecting the type of track (ex. 36-inch flextrack) by clicking the icon in the library. The track appears on the worksheet and you simply drag it into position. If it is to be a curve, you enter in the angle and radius (for example: 45-degree-angle curve and 30-inch radius). As you add new pieces and drag them to the existing track endpoints, they connect automatically and you begin to have a design. You can save your work by giving it a name.
A few of the many additional features include the ability to establish both the height of track runs and the degree of slope. For example, I set my slope parameter at 1.5 percent. As I built inclines or descents by setting various height points, the software would tell me if I was above, at, or below my 1.5 percent maximum at any point on the track run. Once you have your incline, you may find that the slope percentage varies along the route (1.2% here, 1.5% there). To make the incline gradual and consistent, you click a feature called “smooth slope” which averages out the various height points.
As you complete your design, AnyRail provides you with a list of track materials in each of their sizes (number of turnouts by size, number of flextrack, etc.).
Another useful feature is the ability to color code various runs of track. This has many uses including graphically illustrating individual DCC sections. The “text” feature allows you to add words or numbers anywhere on the design. I’m using this feature to number my turnouts on the plan and use the printout on my turnout control panel. It goes on and on. I actually found myself so engrossed in planning that for a while I was in jeopardy of loosing interest in actually building the thing. Given that you can test the software and read the manual for free, and buy the full product for only $59, you’ll gladly throw away the graph paper, pencils and compasses. I did! For more information visit www.anyrail.com.


