Videos & Photos Videos Beginners Build the Black River Junction – part 2

Build the Black River Junction – part 2

By Angela Cotey | May 14, 2015

| Last updated on November 3, 2020


How to lay and wire track and set up a DCC system

Email Newsletter

Get the newest photos, videos, stories, and more from Trains.com brands. Sign-up for email today!

MRRC0207_01
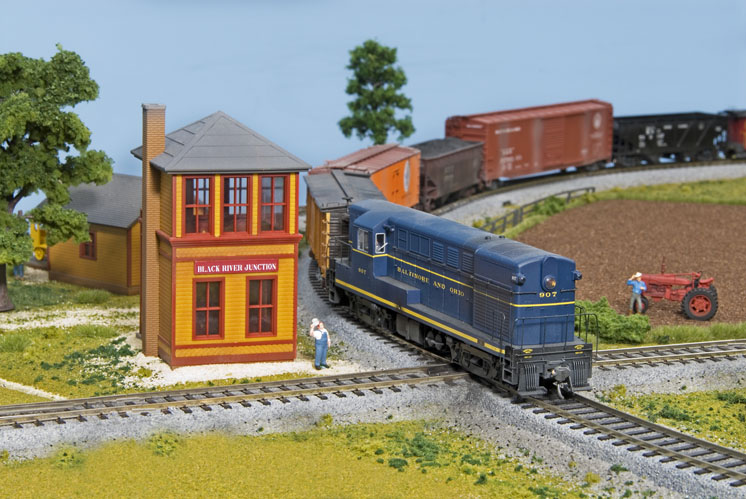
A Baltimore & Ohio Fairbanks-Morse switcher clatters over the crossing at Black River Junction.
Bill Zuback photo

A key part of building a successful model railroad is that the project keeps your interest. One way to stay “hooked” when building a layout is to make sure you can run some trains as quickly as possible. Even if you’re building a large layout, completing a small portion of the track so you can run a train or do a little switching every so often is a good idea. It keeps your interest fresh and gives you something to show visitors.

For our Black River Junction project railroad, getting things running quickly wasn’t difficult. Since we were building the layout in a week, our schedule called for having the track laid and the Digital Command Control (DCC) system wired by the end of the day on Tuesday. While Model Railroader‘s editor, Terry Thompson, installed decoders in our locomotives (see page 90 in the February 2007 Model Railroader), senior editor Carl Swanson was busy laying track on the layout. Then, executive editor Andy Sperandeo got to work installing the DCC system. We’ll take a look at how the MR staff laid the track and wired the Black River Junction for running trains with DCC.

Trackmaterialslist
Black River Junction track plan
MRRC0207_02
Testing the track plan before gluing anything to the layout is a good idea. To get started, Carl pieced together the entire layout’s worth of track to test the fit.
MRRC0207_03
Be extra careful that the rails are properly seated in the rail joiner when connecting track sections. This photo shows a rail that has ridden up on top of the joiner, which will be difficult to fix once the track has been secured.
MRRC0207_04
To make the wire connections nearly invisible, we used Unitrack terminal joiners with the feeders already attached. Carl drilled holes through the layout surface, fed the wires through the holes, clipped the feeder joiners to the track, then glued the track in place.
MRRC0207_11
We softened the sharp edge of the Unitrack’s roadbed profile by adding Kato’s matching ballast. As shown in the photo, the ballast gives the roadbed a more-natural appearance, blending it into the surrounding scenery by removing the sharp, straight edge.
Trackwork

We used sectional track to speed tracklaying. The newer all-in-one-style sectional track snaps together quickly and includes plastic roadbed. The molded roadbed resembles the crushed rock ballast used to hold ties in place on real railroad track. Unlike flextrack or traditional sectional track, no ballasting is necessary – although we found that adding a layer of appropriately colored ballast to the shoulders adds realism and takes little effort. Several companies make all-in-one track, including Atlas, Bachmann, and Life-Like, Märklin (not compatible with 2-rail operation), and Trix.

After considering our options, we decided to use Kato Unitrack. This track features good-looking roadbed and robust joiners for solid mechanical and electrical connections between track pieces. Unitrack turnouts are made in no. 4 and 6 sizes and feature hidden built-in switch machines. These machines have a design that’s unique to Kato and requires a constant-voltage DC power supply. Kato also makes a DC converter that connects to the AC terminals of a power pack. In either case, you’ll need only one to power all the turnouts on your layout.

Hiding the switch machine under the turnout is clever, but the machines can be damaged by water or liquid glue when making scenery. We made sure to keep our turnouts dry and had no problems.

Opening the packages and organizing the pieces took more time than laying the track. To make sure everything would fit properly, I snapped all the track together and, according to David’s plan, set it in place temporarily.

Knowing exactly where the track would go allowed me to mark the locations of the power feeds. I removed the track, drilled small holes in the tabletop for the feeder wires, and installed several Kato no. 24-818 terminal UniJoiners. Terminal joiners take the place of standard joiners and are easy to use since they have feeder wires already attached.

The standard joiners attached to the track can be removed with a plastic tool that Kato packages with terminal joiners. The track sections have a molded plastic ridge in the roadbed behind the joiners. To make room for the wires, I broke away the ridge with needle-nose pliers before clicking the new joiners in place.

Kato’s terminal joiners have a blue wire and a white wire, and I was careful to be consistent in keeping the same color wire going to the same rail all around the layout.

It’s possible for the end of a rail to ride over a joiner when connecting track pieces (see the middle photo), so I checked each joint by sliding a finger along the rails – the track is correct if the joint feels smooth. Finally, using dabs of PL300 construction adhesive, I glued the track in place.

We thought the assembled track looked a little too manicured to be realistic, so Cody Grivno, Terry, and I applied Kato’s no. 24-039 ballast to soften the shoulders of the roadbed (bottom right photo). Working on a few inches of track at a time, we poured on the ballast and arranged it using a soft brush. Then, using a spray bottle, we misted the ballast with a 50:50 mix of rubbing alcohol and water. When the ballast was wet, we used an eyedropper to flow on Woodland Scenics Scenery Cement. – Carl Swanson
 

MRRC0207_05
Andy kept the wiring simple by routing all the feeders on the main layout section to a bus made with two stranded 16AWG wires.
suite-case connectors
To attach the feeders to the bus wires, Andy used Scotchlok “suitcase” connectors. Simply slip the wires into the appropriate holes in the connector, use pliers to squeeze the metal “knife” down flush, and snap the plastic cover (the suitcase lid) shut to protect the connection.
MRRC0207_07
Because the staging yard is removable, we needed an easy yet temporary way to connect it to the main bus. Banana-type plugs and sockets, commonly used with stereo speakers, are perfect for this job and easy to use.

Wiring

Because we planned to use Digital Command Control (DCC), we wired the Black River Junction as one electrical circuit with no blocks. We nevertheless used several sets of feeders to avoid voltage drop and loss of the control signal. There are many rail joints in any kind of sectional track, and they’re all potential trouble spots. The multiple feeders minimize the effects of loose rail joiners and bad connections. The feeder locations are shown on the track plan on page 61.

Under the table, the track feeders connect to a power bus formed by a pair of stranded 16-gauge wires, one red and one black to be consistent with the color coding of DCC systems. However, as Carl noted, the terminal joiners come with blue and white wires. I didn’t bother to change them, but simply made sure to connect all the blue feeders to the black bus wire and all the white feeders to the red bus wire.

To make fast, secure, and insulated connections on the bus, I relied on 3M’s Scotchlok insulation-displacement connectors (IDCs), popularly called “suitcase connectors” because of their hinged lids. With IDCs there’s no need to strip, solder, and tape splices, so the work goes quickly and the results are neat.

The “run” or through side of the red no. 558 IDC fits around the 16-gauge bus wire. The 22-gauge feeder wire goes into the “tap” or single-ended side. Then you squeeze the metal “knife” flush with the open top of the IDC, so the knife cuts through the insulation of both wires and bridges them together.

Robo-Grip cam-action pliers do a good job of squeezing the knife into place; Channellock pliers also work. When you snap the suitcase lid closed, it covers and insulates the knife. In the time you’ve now spent reading about IDCs you could have made at least two or three connections on your layout.

The two bus wires connect to the track terminals of the DCC command station. I made this connection through banana stereo speaker plugs so we can quickly disconnect the command station, but you may not need to bother with that. I also used another set of banana plugs to connect the bus wires to the removable staging yard. – Andy Sperandeo

MRRC0207_B
MRRC0207_08
The Digitrax DCS50 Zephyr command station sits on this shelf and is held in place with hook-and-loop type fastener strips. All of the connections to the command station unplug so we can easily store it when moving the layout.
MRRC0207_09
Andy mounted two plug panels in the layout fascia for the walkaround cabs. The UR91 shown here doubles as the radio receiver for our UT4R radio cab.
materialslist

Digital Command Control

A DCC system gives the Black River Junction easy-to-use multiple-train control, along with the capability to use wireless walkaround throttles and sound-equipped locomotives. We selected the Digitrax Zephyr DCS50 as our DCC system. This is a good starter set that’s easy to expand.

The DCS50 command station includes a keypad with a digital readout that you use to select locomotives, program decoders, and control decoder functions. It has one set of speed, direction, and “brake” controls, and a “jump” feature that lets you use one or two conventional power packs as additional DCC cabs.

Instead of the jump option, we added a couple of Digitrax handheld cabs, a UT4 tethered cab and a UT4R wireless walkaround cab with a radio link. Using 6-conductor data cable and RJ-style connectors, we installed a Loconet cab bus to tie these components together. We ran a 4-foot cable from the command station to a Digitrax UR91 receiver module we installed nearby in the front fascia (one cable). We then connected the receiver module to a UP5 plug panel installed on the opposite side of the layout using a 6-foot cable.

The UT4’s tether can plug into either the radio panel or the plug panel, so it can be used on either side of the layout. The UT4R wireless cab can also be plugged into either panel to assign or de-assign a locomotive (more on that in a bit), then unplugged for walkaround tether-free operation.

We mounted a power strip under the layout and then used plastic ties to hold the power supplies for the command station and the radio receiver in place. For the sake of portability, we didn’t let any of these components extend below the framing. The cables run directly from the power supplies to their respective devices.
 

MRRC0207_12
From looking at the number dials, this UT4R radio throttle has been set to locomotive address 1884, our Trix Mikado. The operator can now plug the cab into the Loconet to acquire the engine and then unplug the throttle to run no. 1884.
MRRC0207_10a
With the trackwork, wiring, and DCC system installation complete, MR’s managing editor Dick Christianson takes a moment to test-run a train over the staging yard tracks before we begin scenery construction.
Operating the system

Once you have the components set up, it’s time to run some trains. The Digitrax instruction manual provides information on how to get the most out of your DCC system, but to get you up and running quickly, I’ll explain a few of the key elements.

When you turn on the power to the Zephyr, it doesn’t immediately supply power to the rails. You need to turn on the track power from the Zephyr’s panel. You do this by pushing the “power” key, located in the left-hand row of buttons. The DCS50’s track status light will come on when the track power is on.

The next thing you’ll want to do is try running a locomotive. To acquire a locomotive’s address from the Zephyr, begin by pressing the “loco” key on the panel. Then, enter the address number of the locomotive and press the loco key again. You should now have control of that engine. If you want to run a different locomotive, repeat the process.

If you’re using either the UT4 or UT4R walkaround throttles, these have a slightly different procedure for acquiring a locomotive. Before plugging the throttle into one of the layout’s plug ports, set the four number dials to the address of the locomotive you wish to acquire. If the number has fewer than four digits, such as engine 480, use zeroes in place of the missing digits (0480). Next, plug the throttle’s cable into the Loconet cab bus, and you should have control of the locomotive. When you want to switch trains, bring the engine to a stop, disconnect the throttle, and then set the dials to the next address. – Andy Sperandeo 

You must login to submit a comment